How to install SSL in cPanel depends on the SSL service enabled by your hosting provider, but the usual process starts in cPanel’s SSL/TLS Status section. You must point your domain to the correct hosting server, issue or activate the certificate, and verify that your website loads over HTTPS without browser warnings.
An SSL certificate is used to establish an encrypted connection between a visitor’s browser and your website. Modern websites use TLS (Transport Layer Security), the protocol that provides this encryption, even though people still commonly call the certificate an SSL certificate.
If you have a website on cPanel and visitors see a “Not secure” warning, the certificate may be missing, expired, incorrectly installed or not covering the domain they opened. The following steps explain how to check the setup, activate a certificate and resolve common problems.
What Is an SSL Certificate in cPanel?
An SSL certificate in cPanel is a digital certificate that helps a browser verify a website’s identity and establish an encrypted HTTPS connection. It is associated with a domain name and must be valid for the exact hostname visitors use.
HTTPS is HTTP communication protected by TLS encryption. It helps prevent third parties on the network from reading or modifying data exchanged between the browser and website, although it does not prove that the website itself is trustworthy.
A valid certificate generally contains information such as the domain names it covers, the issuing certificate authority and its validity period. The browser checks the certificate chain and hostname before showing the secure connection indicator.
Here is what the main terms mean:
- SSL: The older name commonly used for website certificates. Modern secure connections use TLS.
- TLS: A security protocol that encrypts communication between a browser and a web server.
- HTTPS: The secure version of HTTP, used to load website pages through an encrypted connection.
- Certificate authority (CA): An organisation that issues digital certificates after validating the required domain or organisation details.
- AutoSSL: A cPanel feature that can request and manage certificates automatically when the hosting provider has configured a supported certificate provider.
An SSL certificate does not protect every part of a website automatically. You still need secure passwords, updated website software, controlled administrator access and safe handling of stored information.
What Do You Need Before Installing an SSL Certificate in cPanel?
Before installing an SSL certificate in cPanel, confirm that your domain points to the hosting account and that you can access its control panel. Certificate authorities must validate control of the domain before issuing a certificate.
Check these requirements first:
- Domain registration: The domain must be registered and active.
- DNS configuration: The domain’s nameservers or DNS records must point to the correct hosting service.
- Hosting access: You need valid cPanel login details for the hosting account.
- Certificate availability: Your hosting provider must support a certificate service, such as Let’s Encrypt or configured AutoSSL.
- Hostname coverage: Identify whether visitors use the root domain, the www version or additional subdomains.
DNS is the Domain Name System, which directs a domain name to the server that hosts the website. If the domain still points to an old server, certificate validation may fail because the certificate authority cannot confirm the correct hosting environment.
If you recently changed nameservers or DNS records, allow the changes to become visible across DNS resolvers before retrying validation. Keep a copy of your existing DNS settings before changing records, particularly if the domain also handles business email.
Before you learn how to install SSL in cPanel, make sure your domain is connected to the correct hosting account. If DNS is not resolving correctly, use our guide on DNS troubleshooting with the nslookup command. You can also read about the difference between a domain and hosting to understand how both services work together.
How to Install SSL in cPanel Step by Step
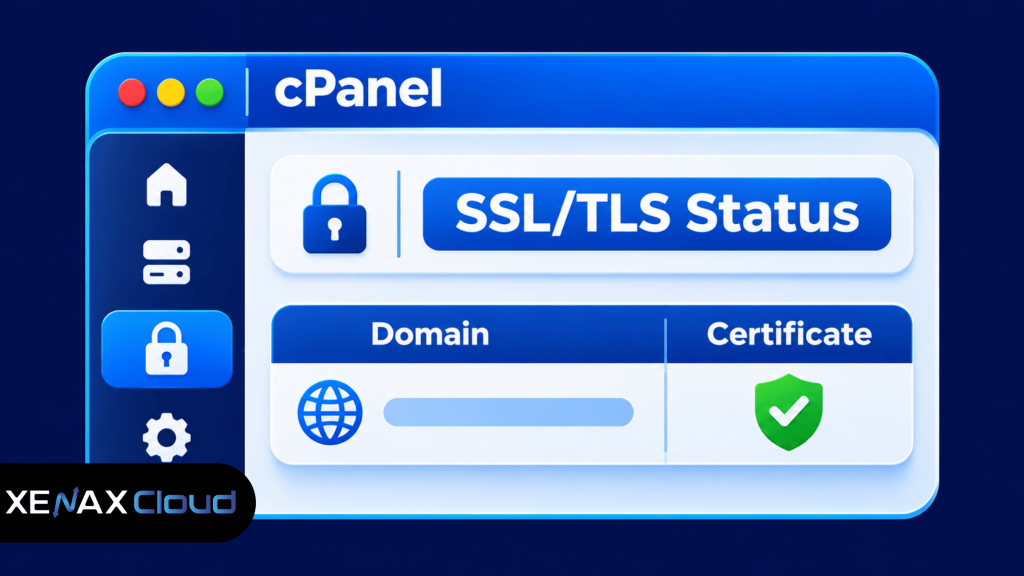
You can install SSL in cPanel through SSL/TLS Status or a provider-supplied Let’s Encrypt interface, depending on the hosting configuration. The exact buttons can differ because hosting providers choose which certificate tools are enabled for their customers.
Follow these steps:
- Log in to your hosting account’s cPanel.
- Open the Security section and select SSL/TLS Status.
- Review the domains and subdomains listed on the page.
- Select the domain names that need certificate coverage.
- Run AutoSSL or use the available Let’s Encrypt option if your provider exposes it.
- Wait for the certificate request and domain validation to complete.
- Verify the website by opening its HTTPS address in a browser.
If your cPanel account displays a Run AutoSSL button, use it after confirming that the domain points to the correct server. If your provider offers a separate Let’s Encrypt SSL interface, follow the provider’s instructions for requesting and activating the certificate.
Do not paste certificate files into cPanel unless you have been given the correct certificate, private key and certificate authority bundle for that domain. The private key must match the certificate, and an incorrect installation can leave the website without a working secure connection.
After activation, check the certificate status again in cPanel. Confirm that the expected domain names are covered, including the www hostname if your website uses both versions.
How to Check Whether HTTPS Is Working
You can check HTTPS by opening your website with https:// and confirming that the browser accepts its certificate without a security warning. Test the main domain and any hostname visitors can use to reach the website.
Use this simple verification table:
| Check | What to verify | What a problem may indicate |
| Main domain | https://example.com loads securely | Certificate missing or hostname mismatch |
| www domain | https://www.example.com loads securely | www not covered by certificate |
| Certificate details | Domain and validity dates are correct | Wrong or expired certificate |
| Page resources | Images, scripts and styles load over HTTPS | Mixed content |
| Redirect | HTTP visitors reach HTTPS | Redirect not configured |
A mixed-content error occurs when an HTTPS page loads some resources, such as images or scripts, through an unencrypted HTTP address. The browser may still load the page, but it can report that the page is not fully secure.
Open the browser’s developer tools and check the Console tab if the page still reports mixed content. Update hard-coded HTTP resource URLs in the website settings, theme, database or page builder as appropriate, and clear any caching layer before testing again.
For an additional certificate check, inspect the certificate details from the browser’s address bar. Confirm the certificate’s subject names, issuer and validity dates rather than relying only on the padlock icon.
How to Redirect Your Website from HTTP to HTTPS
You can redirect HTTP traffic to HTTPS by enabling the appropriate redirect setting in your hosting control panel or website configuration. The redirect ensures that visitors who enter the older HTTP address are sent to the secure version.
In cPanel, look for the Domains section and check whether the Force HTTPS Redirect option is available for your domain. If it is available, enable it only after confirming that the SSL certificate is installed and the HTTPS version loads correctly.
For a WordPress website, also check the WordPress Address and Site Address under:
WordPress Dashboard
> Settings
> General
Both addresses should use https:// once the certificate is active and the website is ready to use HTTPS. Before changing these settings, take a backup because an incorrect URL change can make the WordPress dashboard difficult to access.
Avoid enabling HSTS before testing the HTTPS configuration thoroughly. HSTS instructs browsers to use HTTPS for future visits, and a mistaken configuration can make a website harder to access until the certificate or server problem is corrected.
If your website uses a caching plugin, CDN or proxy, check its HTTPS settings as well. A redirect configured in several places can create redirect loops, so use one clear redirect path and test the result in a private browser window.
Worked Example: Installing SSL for an Indian Business Website
A small business website in Pune with one domain and a WordPress installation can use a cPanel hosting account that includes an SSL service. The owner needs the main domain and www version to load securely, plus a working enquiry form.
The first task is to confirm that both hostnames resolve to the hosting account. The owner then opens cPanel, checks SSL/TLS Status and requests the available certificate through the configured AutoSSL or Let’s Encrypt interface.
For this website, the hosting decision is straightforward:
- Choose Silver if the business needs one website, up to 5 GB disk space, 50 GB bandwidth and three mailboxes.
- Choose Gold if it needs up to three websites, 15 GB disk space, 100 GB bandwidth and six mailboxes.
- Choose Platinum if it needs up to ten websites, 100 GB disk space, 1,000 GB bandwidth and 25 mailboxes.
- Choose Diamond if it needs the plan’s unlimited website, disk, bandwidth and mailbox allowances.
Silver fits the example because the business has one website and its requirements fit within the listed limits. Gold is unnecessary unless the business adds websites, needs more storage or bandwidth, or requires additional mailboxes.
Xenax Cloud Shared Hosting includes Let’s Encrypt SSL, cPanel, LiteSpeed web server technology, DDoS protection and JetBackup 5 backups. The hosting infrastructure is located in one Tier-III data centre in Banda, Uttar Pradesh, India.
The owner should test the website’s contact form after enabling HTTPS and confirm that submissions still reach the intended mailbox. Keep a backup of the website and database before making redirect or URL changes.
What Are Common SSL Errors in cPanel?
Common SSL errors in cPanel usually relate to DNS configuration, domain validation, certificate coverage, expiry or website resources still using HTTP. Identify the exact error before requesting another certificate or changing server settings.
| Error | Likely cause | What to check |
| Domain validation failed | DNS points elsewhere or validation cannot reach the server | A record, nameservers and validation access |
| Certificate does not cover domain | www or a subdomain is missing | Certificate’s listed hostnames |
| Certificate expired | Renewal did not complete | SSL/TLS Status and provider settings |
| Not secure warning | Missing certificate or mixed content | Browser certificate details and page resources |
| Too many redirects | Conflicting redirect rules | cPanel, WordPress and CDN redirect settings |
A certificate authority may use HTTP-based domain validation, which requires the validation request to reach the correct server. Let’s Encrypt’s HTTP-01 challenge uses port 80, so firewall or routing rules that block the validation request can prevent issuance. See the official Let’s Encrypt challenge types documentation.
If AutoSSL fails, check the domain’s DNS records first and then review the exact error shown in cPanel. If the account does not expose the required certificate controls, contact the hosting provider rather than attempting to install an unrelated certificate manually.
How to Maintain an SSL Certificate After Installation
An SSL certificate needs to remain valid and correctly configured after its initial installation. Check its expiry date, renewal status and hostname coverage whenever you change hosting, DNS or website configuration.
Use these maintenance practices:
- Check renewal status: Review SSL/TLS Status or the provider’s certificate management page periodically.
- Keep DNS correct: Avoid changing nameservers or A records without confirming the destination hosting server.
- Test after migration: Recheck certificate coverage and HTTPS redirects after moving a website.
- Review subdomains: Request coverage for additional subdomains if the website uses them.
- Monitor mixed content: Check important pages after changing themes, plugins or external resources.
Automatic renewal depends on the certificate service and hosting provider configuration. Do not assume that every manually installed certificate renews automatically; check the renewal method and contact the provider if the status is unclear.
For cPanel-specific certificate management, consult the official cPanel SSL/TLS Status documentation. The documentation explains how the interface displays certificate information and supported SSL management actions.
How to Install SSL in cPanel: FAQs
Can I install an SSL certificate in cPanel myself?
Yes, you can activate SSL yourself if your hosting provider has enabled a supported certificate interface in cPanel. Open Security, select SSL/TLS Status and check whether AutoSSL or a Let’s Encrypt option is available. If those controls are missing, ask your hosting provider how SSL activation is handled.
Is a Let’s Encrypt SSL certificate suitable for a business website?
Yes, a Let’s Encrypt certificate can secure a business website through HTTPS when it is correctly issued, installed and renewed. It provides domain validation and encryption, but does not independently verify the business’s identity or protect the website from malware, weak passwords or insecure plugins.
Why is my SSL certificate not showing in cPanel?
An SSL certificate may not appear because the domain does not point to the hosting server, validation has failed or the certificate has not yet been issued. Check the domain’s DNS records and the error displayed in SSL/TLS Status. Contact your hosting provider if the certificate service is not enabled.
Does installing SSL automatically redirect HTTP to HTTPS?
No, installing an SSL certificate does not always create an HTTP-to-HTTPS redirect. Enable Force HTTPS Redirect in cPanel if available, or configure a suitable redirect in your website settings. Test the HTTPS address first so visitors are not redirected to a page with certificate errors.
Do I need SSL for every subdomain?
You need certificate coverage for each hostname that visitors access through HTTPS. A certificate may cover the main domain and www version, but other subdomains may require separate coverage or a suitable wildcard certificate. Check the certificate’s listed domain names before assuming every subdomain is protected.
Why does my website show mixed content after SSL installation?
Mixed content appears when an HTTPS page still requests resources through HTTP. Common examples include images, scripts, stylesheets and embedded content with old HTTP URLs. Update those resource addresses, clear the website cache and test the affected pages again using the browser’s developer tools.
Does Xenax Cloud Shared Hosting include SSL?
Yes, Xenax Cloud Shared Hosting includes Let’s Encrypt SSL. The plans also include cPanel, LiteSpeed web server technology, DDoS protection and JetBackup 5 backups. Check the SSL/TLS Status page after your domain is connected to confirm that the certificate has been issued and covers the hostnames you use.
For one business website with up to three mailboxes, Xenax Cloud Silver Shared Hosting is a suitable starting point. Choose Gold or Platinum if you need additional websites, storage, bandwidth or mailboxes, and confirm that your domain points to the hosting account before activating SSL.