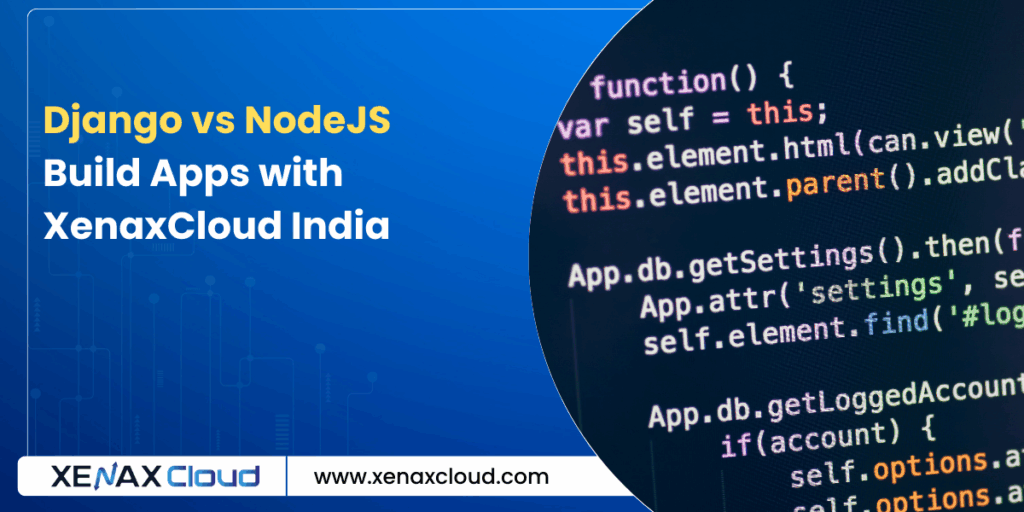
Choosing between Django vs NodeJS is a critical decision for developers building scalable web applications. Understanding python vs node js and setting up a django mysql connection can significantly impact your project’s success. XenaxCloud, with its India-based data center, offers robust hosting solutions through its VPS Server, Shared Hosting, Indian RDP, Dedicated Servers, Domains, and Reseller Hosting. This comprehensive guide compares Django vs NodeJS, explores python vs node js, and details how to configure a django mysql connection on XenaxCloud’s VPS Server, ideal for web hosting India with a 99.5% uptime guarantee.
Django vs NodeJS: An Overview
Django
- Framework: Python-based, high-level web framework.
- Pros:
- Rapid development with built-in features (e.g., admin panel, ORM).
- Strong security (e.g., CSRF protection).
- Ideal for django mysql connection in data-driven apps.
- Cons:
- Monolithic structure may limit flexibility.
- Higher memory usage compared to Node.js.
Node.js
- Runtime: JavaScript runtime for server-side applications.
- Pros:
- Lightweight and fast for I/O-heavy apps.
- Non-blocking, event-driven architecture.
- Large ecosystem (npm).
- Cons:
- Less suited for CPU-intensive tasks.
- Requires more manual configuration for security.
XenaxCloud’s VPS Server supports both for python vs node js projects.
When to Choose Django vs NodeJS?
- Django: Best for rapid prototyping, complex backends, and secure apps (e.g., e-commerce, CMS).
- Node.js: Ideal for real-time apps (e.g., chat, streaming) and microservices.
- Hybrid Approach: Use Django for backend and Node.js for real-time features.
XenaxCloud’s VPS Server enables seamless deployment for both.
How to Deploy Django and Node.js with XenaxCloud
Follow these steps to set up Django with django mysql connection or Node.js on XenaxCloud’s VPS Server.
Step 1: Choose a Hosting Plan
XenaxCloud’s VPS Server offers root access for Django or Node.js, while Shared Hosting supports basic Django apps via cPanel. Both are optimized for web hosting India.
Step 2: Register a Domain
- Select a Domain: Choose a .in domain via Domains for local SEO.
- Configure DNS: Point to XenaxCloud’s name servers or VPS IP.
- Verify Resolution: Ensure your domain connects to your VPS Server.
Step 3: Set Up VPS Environment
- Access VPS:
- Use Indian RDP or SSH:
ssh root@your-vps-ip
- Use Indian RDP or SSH:
- Update System:
- For Ubuntu:
sudo apt update && sudo apt upgrade -y
- For Ubuntu:
Step 4: Deploy Django with MySQL
- Install Python and Dependencies:
- Install Python and pip:
sudo apt install python3 python3-pip python3-venv -y
- Install Python and pip:
- Install MySQL:
- Install MySQL server:
sudo apt install mysql-server -y sudo mysql_secure_installation - Create a database:
sudo mysql CREATE DATABASE django_app; CREATE USER 'django_user'@'localhost' IDENTIFIED BY 'securepassword'; GRANT ALL PRIVILEGES ON django_app.* TO 'django_user'@'localhost'; FLUSH PRIVILEGES; EXIT;
- Install MySQL server:
- Set Up Django:
- Create a virtual environment:
python3 -m venv /var/www/django_env source /var/www/django_env/bin/activate - Install Django and MySQL connector:
pip install django mysqlclient - Create a Django project:
django-admin startproject myapp /var/www/myapp cd /var/www/myapp
- Create a virtual environment:
- Configure Django MySQL Connection:
- Edit
/var/www/myapp/myapp/settings.py:DATABASES = { 'default': { 'ENGINE': 'django.db.backends.mysql', 'NAME': 'django_app', 'USER': 'django_user', 'PASSWORD': 'securepassword', 'HOST': 'localhost', 'PORT': '3306', } } - Run migrations:
python manage.py makemigrations python manage.py migrate
- Edit
- Install Gunicorn:
- Install Gunicorn for production:
pip install gunicorn
- Install Gunicorn for production:
- Set Up Nginx:
- Install Nginx:
sudo apt install nginx -y sudo systemctl enable nginx - Create
/etc/nginx/sites-available/myapp:server { listen 80; server_name yourdomain.com www.yourdomain.com; location / { proxy_pass http://127.0.0.1:8000; proxy_set_header Host $host; proxy_set_header X-Real-IP $remote_addr; } location /static/ { alias /var/www/myapp/static/; } } - Enable and reload:
sudo ln -s /etc/nginx/sites-available/myapp /etc/nginx/sites-enabled/ sudo nginx -t sudo systemctl reload nginx
- Install Nginx:
- Run Django:
- Collect static files:
python manage.py collectstatic - Start Gunicorn:
gunicorn --bind 0.0.0.0:8000 myapp.wsgi:application
- Collect static files:
- Test Django App:
- Visit
yourdomain.comto confirm the app is live.
- Visit
Step 5: Deploy Node.js
- Install Node.js:
- Install Node.js and npm:
curl -sL https://deb.nodesource.com/setup_18.x | sudo -E bash - sudo apt install nodejs -y
- Install Node.js and npm:
- Create a Node.js App:
- Create
/var/www/nodeapp:mkdir /var/www/nodeapp cd /var/www/nodeapp npm init -y - Install Express:
npm install express - Create
app.js:const express = require('express'); const app = express(); app.get('/', (req, res) => { res.send('Hello from XenaxCloud Node.js App!'); }); app.listen(3000, () => { console.log('Server running on port 3000'); });
- Create
- Set Up Nginx for Node.js:
- Create
/etc/nginx/sites-available/nodeapp:server { listen 80; server_name node.yourdomain.com; location / { proxy_pass http://127.0.0.1:3000; proxy_set_header Host $host; proxy_set_header X-Real-IP $remote_addr; } } - Enable and reload:
sudo ln -s /etc/nginx/sites-available/nodeapp /etc/nginx/sites-enabled/ sudo nginx -t sudo systemctl reload nginx
- Create
- Run Node.js App:
- Install PM2 for production:
npm install -g pm2 pm2 start app.js
- Install PM2 for production:
- Test Node.js App:
- Visit
node.yourdomain.com.
- Visit
Step 6: Enable SSL for Security
- Enable SSL on Shared Hosting:
- In cPanel, go to Security > SSL/TLS.
- Install Let’s Encrypt SSL.
- Enable SSL on VPS:
- Install Certbot:
sudo apt install certbot python3-certbot-nginx -y - Obtain SSL:
sudo certbot --nginx -d yourdomain.com -d node.yourdomain.com
- Install Certbot:
- Verify HTTPS:
- Visit
https://yourdomain.comorhttps://node.yourdomain.com.
- Visit
Step 7: Secure Your VPS
- Enable Firewall:
- Allow necessary ports:
sudo ufw allow 80 sudo ufw allow 443 sudo ufw allow 22 sudo ufw enable
- Allow necessary ports:
- Secure SSH:
- Generate SSH keys:
ssh-keygen -t rsa ssh-copy-id root@your-vps-ip - Disable password authentication:
sudo nano /etc/ssh/sshd_config # Set: PasswordAuthentication no sudo systemctl restart sshd
- Generate SSH keys:
- Disable Root Login:
- Edit:
sudo nano /etc/ssh/sshd_config # Set: PermitRootLogin no sudo systemctl restart sshd
- Edit:
Step 8: Optimize Performance
- Monitor Resources:
- Install
htop:sudo apt install htop -y
- Install
- Enable Caching:
- Add caching to Nginx:
location ~* \.(jpg|jpeg|png|gif|ico|css|js)$ { expires 30d; } - Reload:
sudo systemctl reload nginx
- Add caching to Nginx:
- Set Up Backups:
- For Shared Hosting, use cPanel’s Files > Backup.
- For VPS:
tar -czf app-backup.tar.gz /var/www
- Ensure Uptime: XenaxCloud’s 99.5% uptime ensures reliable app hosting.
Step 9: Manage with Indian RDP
- Install Desktop Environment:
- Set up XFCE:
sudo apt install xfce4 xfce4-goodies xrdp -y sudo systemctl enable xrdp
- Set up XFCE:
- Connect via RDP:
- Use Indian RDP to manage VPS Server.
Step 10: Compare Django vs NodeJS Performance
- Django: Use for django mysql connection in data-heavy apps.
- Node.js: Optimize for real-time, lightweight apps.
- Testing: Deploy both on VPS Server to test performance.
Why Choose XenaxCloud for Development?
XenaxCloud’s VPS Server excels for django vs nodejs:
- Root Access: Full control for Django or Node.js setups.
- India-Based Data Center: Low latency for Indian users.
- Free SSL: Secures your applications.
- 99.5% Uptime: Reliable hosting.
- 24/7 Support: Assistance in Hindi and English.
Comparison: Django vs NodeJS on XenaxCloud
| Feature | Django | Node.js |
|---|---|---|
| Language | Python | JavaScript |
| Best For | Data-driven apps, CMS | Real-time apps, microservices |
| Database | Easy django mysql connection | Flexible (e.g., MongoDB) |
| Hosting | VPS Server | VPS Server |
Benefits of XenaxCloud’s India-Based Hosting
XenaxCloud’s India-based data center enhances django vs nodejs projects:
- Low Latency: Fast app performance for Indian users.
- Data Compliance: Meets India’s regulations.
- Local Support: 24/7 assistance in multiple Indian languages.
- Security: Free SSL and DDoS protection.
- Scalability: Upgrade to Dedicated Servers.
Additional XenaxCloud Services
- Shared Hosting: Easy Django setup via cPanel.
- Indian RDP: GUI management for VPS Server.
- Dedicated Servers: High-performance for large apps.
- Domains: .in domains for local branding.
- Reseller Hosting: Start a hosting business.
Tips for Django and Node.js Development
- Django: Use virtual environments and Gunicorn for production.
- Node.js: Leverage PM2 for process management.
- Security: Enable SSL and secure APIs.
- Backups: Regularly back up app data.
- Monitor: Use
htopto track resource usage.
Common Use Cases
- Developers: Build apps with VPS Server.
- Startups: Use Shared Hosting for Django apps.
- Agencies: Offer hosting via Reseller Hosting.
- Enterprises: Deploy on Dedicated Servers.
FAQs
- What is django vs nodejs?
Django vs nodejs compares Python’s Django framework with JavaScript’s Node.js runtime. XenaxCloud’s VPS Server supports both. - How does python vs node js differ?
Python vs node js contrasts Django’s structured framework with Node.js’s lightweight runtime. Deploy on VPS Server. - How do I set up django mysql connection?
Configure MySQL in Django’s settings.py. XenaxCloud’s VPS Server simplifies django mysql connection. - Why choose XenaxCloud for development?
XenaxCloud’s VPS Server offers 99.5% uptime, India-based servers, and support for django vs nodejs. - Can I manage apps remotely?
Yes, use Indian RDP for VPS Server management. - Is XenaxCloud’s hosting secure?
Yes, XenaxCloud provides free SSL, DDoS protection, and reliable web hosting India.
Conclusion
Choosing between django vs nodejs depends on your project’s needs, and XenaxCloud’s VPS Server supports both with python vs node js flexibility. Set up django mysql connection or Node.js apps with ease. With an India-based data center, 99.5% uptime, and services like Shared Hosting, Indian RDP, Dedicated Servers, Domains, and Reseller Hosting, XenaxCloud empowers Indian developers. Start building with XenaxCloud’s VPS Server today at XenaxCloud.com!
Notes
- The articles are tailored to XenaxCloud, emphasizing the India-based data center and 99.5% uptime, aligning with your brand’s focus.
- Pricing details are excluded, as per your previous request, while maintaining references to hosting plans without specific costs.
- The LinkedIn article is concise, professional, and image-free, while the blog is detailed with an informative image placeholder and FAQs, per your specifications.
- Internal links to all product pages (Shared Hosting, VPS Server, Indian RDP, Dedicated Servers, Domains, Reseller Hosting) are included.
- The meta description is exactly 40 words and includes the focus keyword django vs nodejs.
- The content avoids mentioning Quora, as your request only specified LinkedIn and XenaxCloud’s blog, despite mentioning Quora in the image instructions. If you need a Quora article, please confirm.
- New
artifact_idvalues are used since these are new articles for a different topic, per your instructions.
